

This year I am moving to a new school and I don't have any rugs in my classroom. I made this super easy t-shirt rug this afternoon. It took me about 2 hours from start to finish. Below are all the directions you will need to create this colorful rug for your home or classroom, too.
Materials needed:
About 10 old t-shirts (at least 1 will need to be a youth size shirt)
Hula hoop -Larger works better, I used a smaller size hoop because that is what I had already. The size of the hoop will directly affect the size of your rug. I think 33" is the biggest there is.
ScissorsDirections:
The first thing you will do is cut the t-shirts. Lay the shirts out and cut the trunk of the shirt into strips about 1" in width. You will need 11 loops from the first shirt (the youth size shirt) as we you use this shirt as the loom. The rest of the shirts don't matter as much, as long as the pieces are about 1" wide. Cut the shirt all the way up the trunk until you get to the sleeves. (You wont need the rest of the shirt, so you can save it for other crafts).

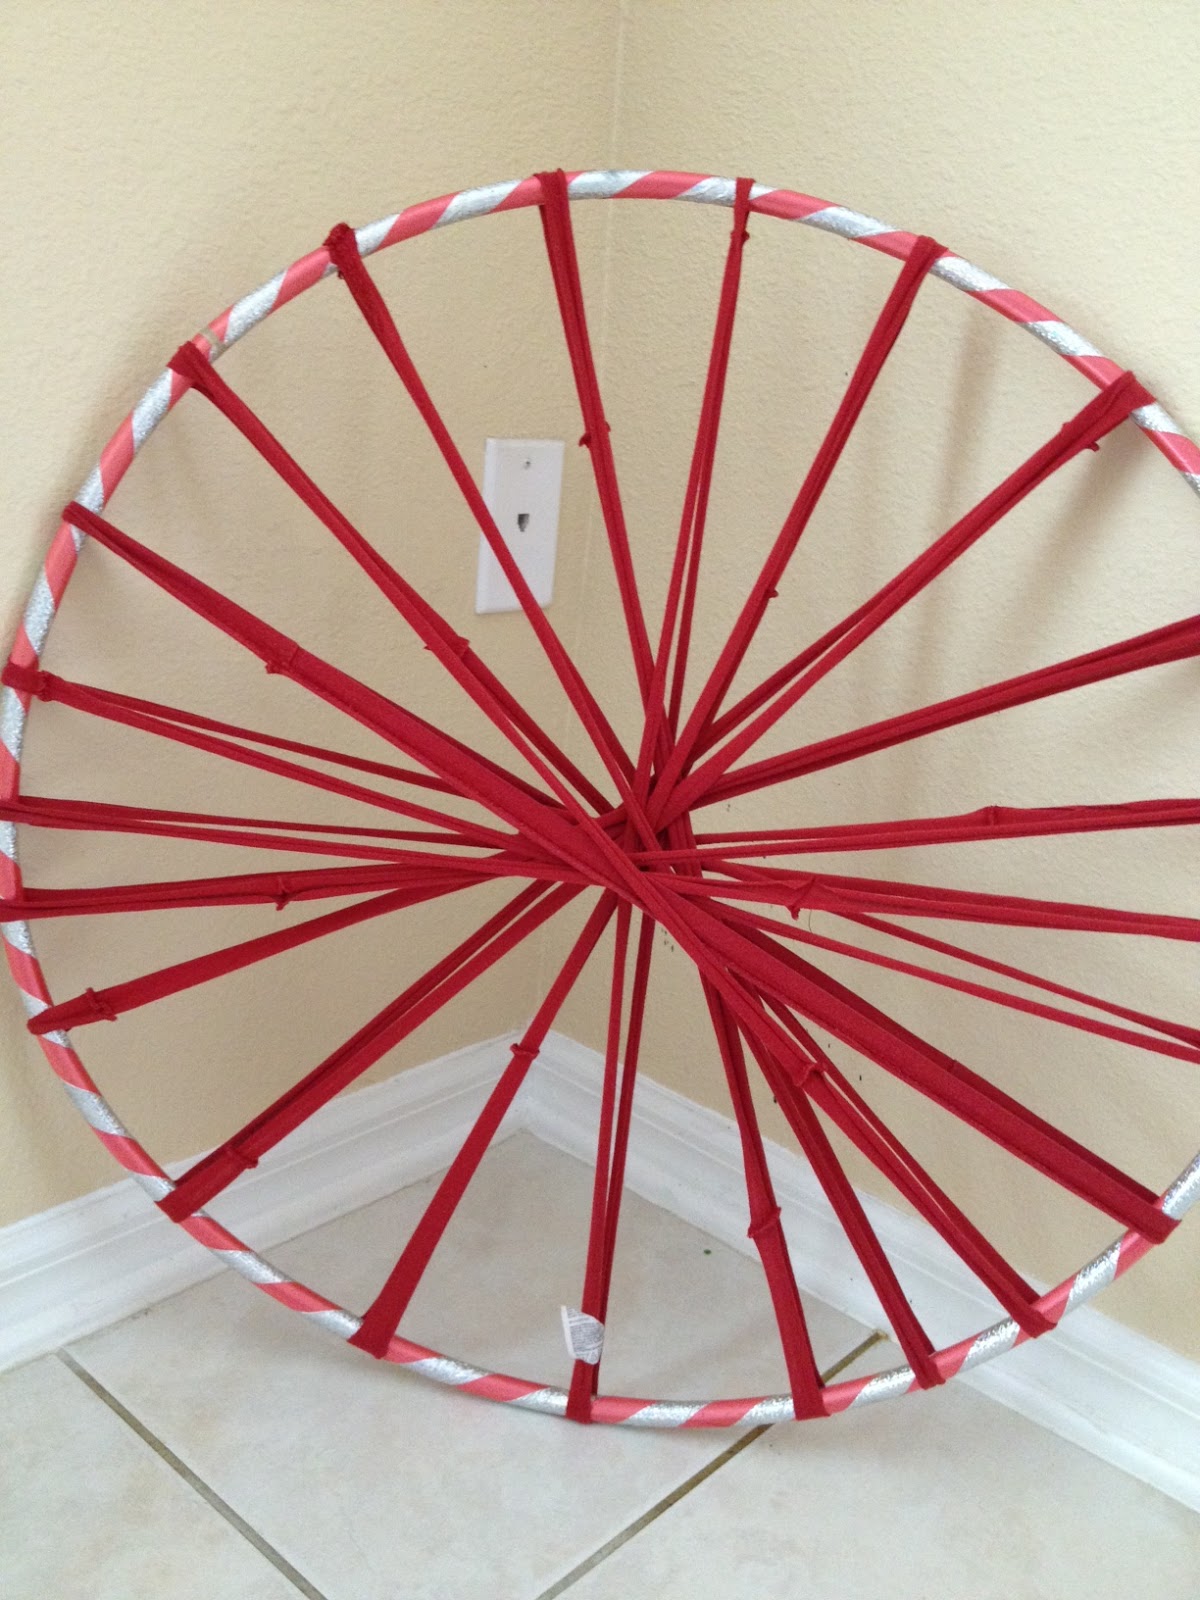
Next, you will put the 11 loops from the youth shirt on to the hula hoop. Start with one, and then put the next loop perpendicular to the first (see below).

Then use the rest of the loops from the youth size shirt to fill in the spaces. When you are done, it should look something like the one below. Be careful to maintain the shape of the hula hoop. If it gets distorted, make sure you straighten it back out the best you can before you start to weave or your rug will be lopsided.
Before you start to weave, you will need to push 2 of the spokes on the loom together. This will keep the weave in an alternating pattern. Next, you will tie your first loop of fabric on to a spoke near the center of the loom where all the spokes cross each other. I tied mine on the two spokes that I put together in the last step. This is a good idea because you will need to keep track of this spoke. To tie the loop onto the spoke, wrap it around the spoke and pull it back through itself (you will use this tie to add pieces later, scroll down to see a photo of this technique).

 Next, weave the loop of fabric over and under each spoke. You will keep the two pieces of the spoke together for now. Make the weave snug, but don't over-tighten it or your rug will not lie flat (I made this mistake on my first rug). When you get to the end of the loop, attach another by putting the loop through the last and pulling it back through itself.

As you weave, push the pieces toward the center of the rug and be sure you don't see any spaces. If you see spaces now, they will be in your rug later. Continue weaving until your rug is about the width of your hand. Then you will begin to weave each piece of the spoke individually, going under and over each individual piece of fabric instead of the doubled spokes. When you get to the two spokes you put together, pull them apart. One of those two spokes will be treated as all the others (individually weaving over and under each part). The other will stay together as one piece of fabric (do not separate and weave under and over individually). This will continue the alternating pattern of over and under.


Continue weaving and adding strips of fabric until your rug is about 4 inches from the hula hoop. Then cut the last loop and tie onto the closest spoke and tuck the ends into the rug.


Last, you will cut each spoke off the hula hoop and double knot it.

Continue around the hula hoop until each spoke is cut and tied. Voilà, your t-shirt rug is complete!


Hi, my name is Annemarie and I'm a Children's Librarian. I'm hoping to make these rugs with families this spring, and I was wondering of I could use one of your photos for my publicity. Thanks!
ReplyDeleteI hope she says you can.
DeleteThis was a really great read, appreciation for taking the time to put it together! Touched on some very good...
ReplyDeleteBuy Clothes Online | Printing On t-Shirts
Love this. I'm a kindergarten teacher and I'm wondering if I could do this with my students. I would show them how and then let the kinders take turns working with a partner while I monitor the project. I think they will love it!
ReplyDeleteThis is a very consise tutorial except for 1 thing. How did you put/keep the warp strips spaced on the hulahoop?
ReplyDeleteThanks for the nice blog. It was very useful for me. Keep sharing such ideas in the future as well. This was actually what I was looking for and I am glad to came here! Thanks for sharing the such information with us
ReplyDeletediscount rugs
Amei este trabalho. Vou me aventurar em fazê-lo. ❤️😘
ReplyDeleteThanks for sharing Blog.. Rug Australia Online
ReplyDelete